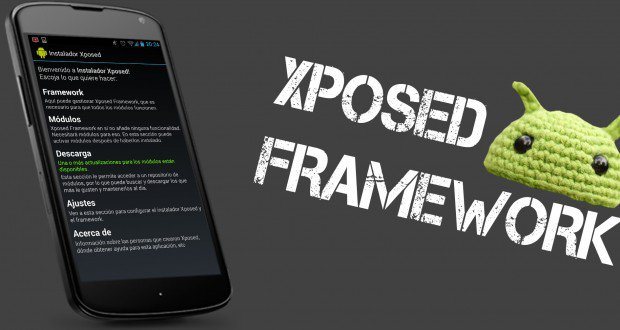
Xposed Framework For Android & How To Install It[Guide]
Description

Android is known for its extensive customization potential but unless you have a rooted device, you can only customize it using widgets and different home screen launcher apps. Rooting your device further expands the potential, giving you the ability to run apps that modify the core of the OS and do things not otherwise possible on it. Unlocking the bootloader and flashing a custom recovery takes you to a whole next level, allowing you to install custom mods and even full ROMs that can drastically change your user experience. However, with flashing custom mods or ROMs, you give up the stability, simplicity & reliability of pure vanilla Android. Wouldn’t it be great if only rooting would allow you to get the features that are otherwise available only via mods and custom ROMs? Xposed framework is a groundbreaking development that lets you do just that. It’s easy to install and configure, and already has a plethora of modules available that bring functionality to your device that otherwise requires flashing a custom ROM or mod from recovery. Read on to learn more about this amazing framework, complete with installation and usage instructions.
Brought to us by XDA Recognized Developer rovo89, Xposed framework uses root access to directly access core Android resources and utilize them to run different modules on the device that bring new features to the OS. The potential here is virtually unlimited, and many developers have already started switching to it for delivering their mods. So, how do you get the framework on your device? It’s as easy as installing an app and tapping a couple of buttons. So, let’s get right to it.
Disclaimer: Please follow this guide at your own risk. iHackedit will not be liable if your device gets damaged or bricked during the process.
To be on the safe side, take a full backup from your recovery before proceeding. If you don’t have a custom recovery, still make sure to backup all the important stuff that you can.
Also, make sure you’re running Android 4.0 Ice Cream Sandwich or later, or else Xposed will not work. Lastly, as we mentioned before, your device needs to be rooted for Xposed to work. If your Device in not Rooted you should be able to find rooting instructions at XDA or with a quick Google search.
Installing Xposed Framework
Download the latest Xposed framework installer app form Download Section , and sideload the downloaded APK to your device in order to install it. Once installed, launch the Xposed Installer app from your app drawer.
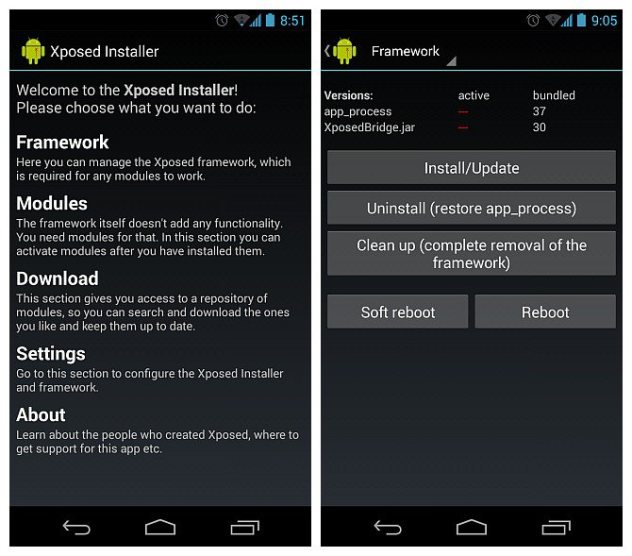
Go to Framework, and tap the ‘Install/Update’ button. Don’t worry if the app seems stuck here; just give it time and it will eventually show you a Superuser request, which you should make sure to grant.

The framework will then install by itself, and prompt you when the installation process is finished. You will now need to reboot the device before you can start using the framework, so tap the ‘Reboot’ button. That should be it – when your device reboots, Xposed framework will be fully installed and you’ll be ready to install its modules to start customizing your device.
Now Xposed framework itself doesn’t bring any new functionality to your device that you can directly use; being a framework, it sets up the foundations for its modules, and it’s those modules that actually bring new features to your device. So, let’s take a look at how you can find and install Xposed modules, which is also just as easy as installing the framework itself.
Installing An Xposed Framework Module
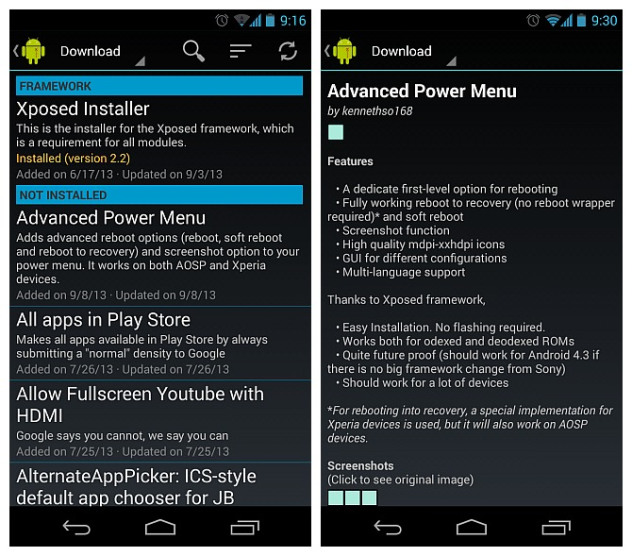
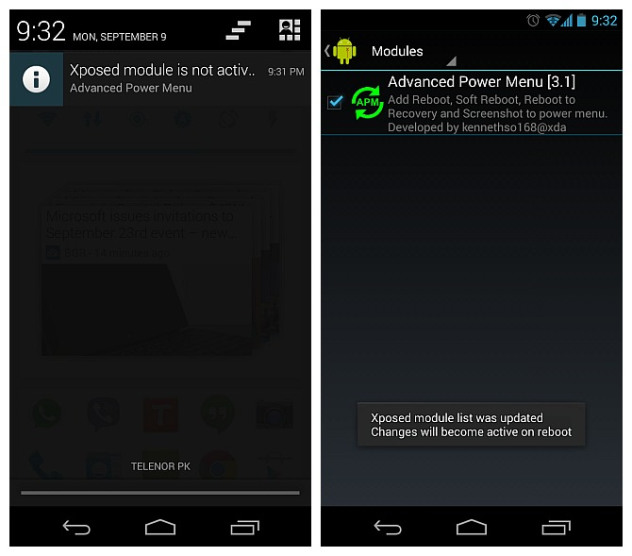
Xposed modules are just APK files that can be installed like any other APK files. the Xposed installer app features a Downloads section that contains lots of modules, but you can also find other modules in form of APKs on XDA and other websites. To install one of the modules available in the Xposed Installer app, open the app and go to the Download section. You’ll see a long list of available modules, each with a description of what it does. Select the module that you want to install by tapping on it, and you’ll be shown further details about it. We have chosen the Advanced Power Menu module here that adds advanced options to the power menu that you get when long-pressing the power button.
Scroll down on the details page and you’ll see a Download button. Tap it, and it will start downloading. Once it has been downloaded, you’ll get a similar installation prompt that you get when sideloading an app from its APK. Go ahead and install it.
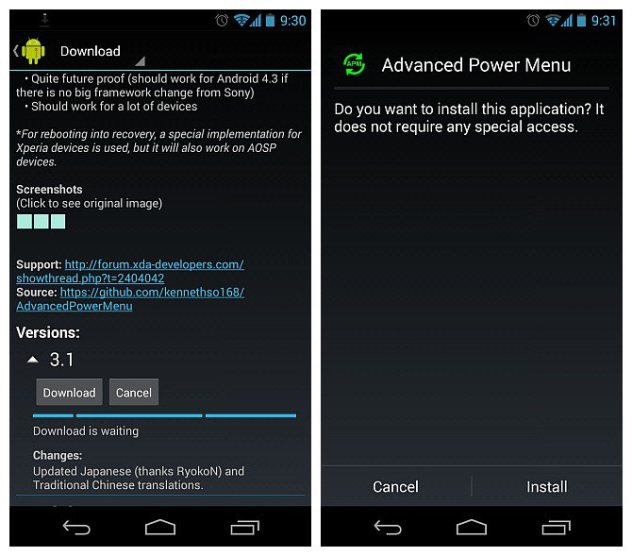
That’s it – the module has been installed. In case you want to install a module from its APK directly, simply sideload it like any other APK, and it will also get installed.
Enabling And Using An Xposed Framework Module
Installation itself doesn’t enable the module; it only makes it available to Xposed. Regardless of whether you install a module from the Xposed Installer app or by sideloading its APK directly, you will be shown a notification prompting you that the module isn’t active. Tap this notification and you’ll be taken to the Modules section of the Xposed Installer app. (You can also go there directly by opening the Xposed Installer app and tapping Modules.) Here, you can enable or disable any of the available modules using the check box next to them.
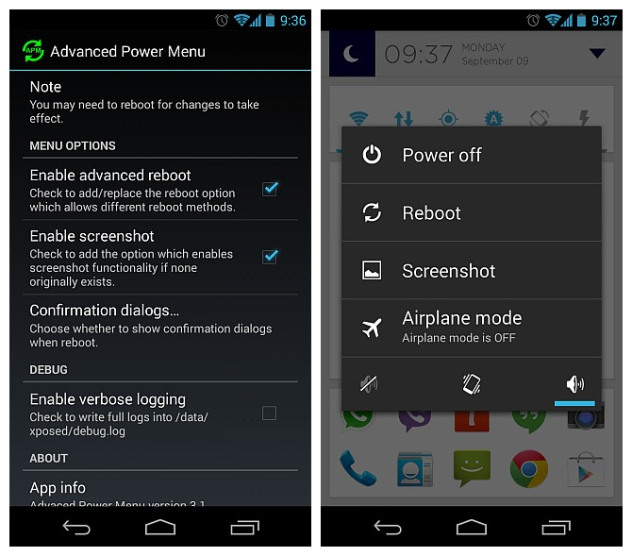
Tapping any module’s entry here takes you to its configuration page, where you can play around with its settings to tweak it the way you like. Modules may require you to reboot your device for their changes to take effect. If that’s the case, do so after enabling it. Once a module has been installed, enabled and configured, you’ll be able to start using its features. In our example, the module changed the power menu of our stock Android 4.3 Jelly Bean ROM on Galaxy Nexus to the one shown below, adding Reboot and Screenshot options. The Reboot menu added by this module further allows rebooting into recovery and a soft reboot, in addition to a normal one.
The way Xposed functions and the possibilities it opens up make it a truly revolutionary development in the world of Android customization. With the right selection of modules, you can have pretty much every major feature of popular custom ROMs on your device, all while still being on the stock ROM and without having to flash any files from recovery.
For more information about the framework, staying up to date with the developments and seeking help with any issues (related to the framework itself, and not related to any particular modules), head over to its development thread at XDA via the following link.
Important! Note- If your any of your device is harmed either by bricking or reboot loop iHackedit is not Resopnsible in any way! Please do it on your own responsibility. The above content is for informative/educative purpose only.
Useful Links
Downloads
For any Queries and more information please Comment Below!
Related apps


2 comments on "Xposed Framework For Android & How To Install It[Guide]"
Leave a Reply
You must be logged in to post a comment.
Hot – Apps & Games
-
 DRAGON BALL Z DOKKAN BATTLE Mod APK [JP]MOD5.28.0 Bandai Namco Entertainment Inc. June 17, 2025
 -
Last Day on Earth Mod APKMOD1.20.14 KEFIR November 4, 2023
-
Among Us Mod APK/IPA [Android+iOS]MOD2025.3.28 Innersloth LLC March 31, 2025
-
Free Fire Mod APK + OBB + iOS Hack1.102.1 Garena International I October 25, 2023
-
Free Fire MAX Mod APK + OBB2.102.1 Garena International I October 25, 2023
-
YouTube ReVanced APK [New Youtube Mod]MOD20.12.46 ReVanced Team April 8, 2025
-
Brave Frontier v2.19.3.0 Mod APKApril 7, 2021
-
Tower of Saviors Mod APK (神魔之塔)MOD2025.411 Mad Head Limited August 20, 2025
-
Choices: Stories You Play Mod APKMOD4.2.0 Pixelberry April 2, 2025
-
ONE PIECE TREASURE CRUISE Mod APK [Global]MOD14.0.3 Bandai Namco Entertainment Inc. June 30, 2024
-
Latest updates
-
DRAGON BALL Z DOKKAN BATTLE MOD APKMOD5.29.0 Bandai Namco Entertainment Inc. August 23, 2025
-
Tower of Saviors Mod APK (神魔之塔)MOD2025.411 Mad Head Limited August 20, 2025
-
ProtonMail Mod APK [Unlocked]MOD4.15.0 Proton AG August 6, 2025
-
MobiOffice Premium APKMOD15.7.57128 MobiSystems August 5, 2025
-
Duolingo Mod APKMOD6.41.4 Duolingo August 5, 2025
-


So i’ve downloaded Xposed installer app but when i open the app i do not have the framework, it says i have to download that as well. I’m running a Galaxy s5 with a 6.1 recent update.
I’ve looked everywhere for instructions on how to get the framework and i was reading up and it said i needed to download another file and upload it into custom recovery although i can’t seem to get custom recovery to work as well. i’d appreciate the help 🙂
Please read